Sunday, April 26, 2015

DIY Simple Fire Pit


***WARNING***
The photos that are displayed in this post were not taken by myself. Unfortunately, I had to work the day my husband decided to complete our new fire pit, but he was sweet enough to attempt to take photos for me for each step (sweet, right?), and he did a pretty damn good job, considering the weather was rainy. Please forgive me on this post for not having "high-quality-blog-worthy-photos," this is REAL life, and it happens. At least you'll still get the "picture" --- haha! Get it?

Ok, so here it is. Finally. The DIY fire pit that everyone posts about. I've seen it on everyone's Outdoor board or Landscaping board or DIY board on Pinterest. I mean, honestly, I pinned probably 7 different ones before we did our own. The difference in ours is, we took a little bit from every post we read and made it our own. IT. WAS. SIMPLE. Like, a monkey could do it - simple. The things you will need for this project are:

1. Landscaping pavers
2. River rock or pebbles
3. Sand (optional - we did not use this)
4. A wheelbarrow
5. Hand tamper
6. Orange spray paint
7. Rope
8. Screw driver
9. Shovel
10. Scrap 2x4" (to place level on)
11. Level
12. PL Premium landscaping/concrete adhesive

*We opted for a bigger fire pit, because my husband wanted to make sure bigger pieces of wood could fit easily in the pit to be burned. So we went for a 3-foot inner diameter. Check your local landscaping/home improvement store for different options. We went to Lowe's and purchased the largest pavers we could. I think we ended up buying 45 pavers and used 42.

So, the first step is to obviously figure out where you want your pit to be in your yard. Then you'll want to spray paint the circle on the ground where the stone will be laid. To come up with the radius, you take the inner circle diameter measurement, divide by 2 + the depth of the paver + another foot for the outside = the radius --- make sure all measurements end up in inches - it just makes it easier.

Our math problem looked like this (feet converted to inches): 36"/2+7.5"+12"=37.5"
For a 4 foot inner circle: 48"/2+7.5"+12"=43.5"
For a 3 foot inner circle but smaller pavers: 36"/2+4"+12"=34
*It just all depends on the inner circle diameter, the depth of the pavers, and the amount of stone you want around the outside of your fire pit.

After you have your radius figured out, you are going to measure your rope to this. One end will be staked in the middle of where the pit will be (we used a screw driver in the ground to hold the rope in the center), the other end we taped at 37.5" and kept the spray can at that point while spraying the circle on the ground by swinging the rope 360 degrees. It sounds more complicated typing this out, but it was really easy. Here is, as good of a photo as I could get... (It was taken a few days after spraying it, and it had rained in between those days also - GOOD OLE INDIANA SPRING WEATHER, blah).


We messed up our measurements the first time, so there are 2 orange circles. The outer circle, is the correct measurement. 

Once the circle is painted on the ground, it's time to cut the grass and pull the sod up. Keep the sod for any bare spots in your yard. As you can tell by the photos, we had A. Lot. of bare spots... new-yard-struggles ya'll.

Next, the ground will need to be tamped so it's packed and helps with the stone from settling. Try to get this as level as you can, keeping in my mind the slope of your yard. This is also the step where you can add sand on top of the tamped dirt to help even more with settling.


After the dirt is tamped, fill in the circle with the type of stone you desire. It honestly doesn't matter, I just wouldn't get anything too crumbly, since it will be getting pretty hot with the fire. We opted for simple "river pebbles" from Lowe's. Make sure to get the stone as level as possible. Using a scrap board and setting a level on top of that will help.


Next, set the first layer of pavers in the rocks, making sure it creates a circle in the center, and that it is as level as possible. My husband spaced out the pavers just a little, for 1) allowing air into the bottom of the pit to keep the fire "alive" and 2) if they were all touching, it wouldn't make a perfect 3' inner circle diameter.


Before placing the 2nd and 3rd layers of pavers on, make sure to apply the landscaping adhesive to both sides of the pavers - it adhered better that way. After you get the last layer on, you're done! That's it. So simple, see?


(How about those cute Hubby work boots making an appearance in the photo? He did such as good job on this!)

Another step you can do, but we didn't, is to spray the pavers on the inside of the pit with high heat spray paint to help them from becoming weak and crumbling. I didn't think it was that big of a deal, so we opted not to. Plus I didn't want the inside of the fire pit black. You could, though, put a metal ring on the inside. Again, we opted not to, but would, if needed, down the road.

So, there you have it. The easiest, outdoor, DIY project you can do for a pretty tight budget. I think we spent a total of $125.00 on everything. Obviously we already had the screw driver, rope, spray paint, and shovel, and we borrowed the wheelbarrow and hand tamp, but everything else we bought.


Let me know if you decide to complete a fire pit this summer. Attach your photos of it below.

In other news... we are currently completing a new coffee table using Ana White's plans for the Rustic X Coffee Table. I'm using a special DIY stain to make it look weathered - I'm pretty excited! I will let you all know how that turns out, so make sure you are following on Facebook at www.facebook.com/theyellowbarn1

Until next time,

Sunday, February 8, 2015

Organizing Your Files


Here is a quick post about how we organize our filing system...

So I failed at taking a photo of the before, because I just wanted to get this done, but I'll show you what I was working with. (Now take in mind, I was pretty organized before I "re-organized" my files, but before that, my filing cabinet was a disaster!)


As you can see, I already had colored file folders, tabs, and labels. I just needed to update some of the file tabs to go along with the bills we had as of now. We refinanced our home recently and I had to update that. We got rid of a vehicle and bought a new one, and had to update that. Riley's childcare changed, so that was another thing I needed to update. You get my drift? :) So here is how I organize our filing cabinet...

First, I bought colored, hanging file folders. I have red, orange, yellow, green, blue, and purple. Red is for medical (medical insurance, EOBs, and medical bills). Orange is for personal files (so each of us have our own file where we keep things like old photos, passports, birth certificates, shot records, etc). Yellow is all of our retirement accounts (my 401K, Tyler's NEAP). Green is all about our finances (our taxes by year, our account statements, CDs, etc). Blue is all of our important bills (like our mortgage, car insurance, utilities, and childcare). No I do not keep all of our billing statements... that's just too much paperwork to keep. But we always have a record of how it was paid and when, with our bills binder finance checklist - check out this post for more about that - so if I need to go back and look how it was paid, I can. Then I can either get a copy of the cleared check from our bank or print out a bank statement, as proof of payment. Last but not least, purple is all of our college & student loan information. I kept every single promissory note for each student loan we have. I've also kept all of our important documents from the colleges we attended. I even have a spot for my FAFSA. That stuff is important to keep since it's such a huge chunk of change to repay! 

Next, I set what I already had in the correct piles and started going through the huge box of papers I needed to file - from over a year ago - ahhh! 


So everything was sorted out, and old papers were set in a pile to be shredded (see that huge stack on the right?... that's the shred pile). I only keep 10 years of tax returns, and 1 year of bill statements. I do not have check stubs from our employers either since they upload them online every week (saves on trees and saves me space in our filing cabinet too), but my suggestion would be to keep at least 2 years of paystubs in case you need to reference them for insurance purposes, if you pay union dues, or to keep track of wages for tax returns. Once I finally got all of my piles done, I used a word document I searched for on Google for new tabs, and printed them on cardstock so they were sturdy. And finally, filed them in rainbow order...


It's such a good feeling when you get a task like that finished. I do have more room now since I got rid of that huge stack of paperwork I no longer needed. What a relief!!

My next project is to figure out a way to *remember* to file things right away instead of having that pile build up over time. That is going to be a task. I will keep you updated on that. Let me know if you have any questions regarding this post. There are so many ways to organize a filing cabinet, but this way works best for our family. Post some photos of your filing cabinet below! Until next time.

Sunday, February 1, 2015

Organizing Your Bills


Bills. Where do I start? I'm not perfect, no one is. We've made many late payments, missed payments, had bills sent to collections, and so on. It was frustrating. Very frustrating. Because I wasn't trying to *NOT* make my payment, I just forgot because I never had anything set up to keep me on track with my bill payments. Until I stumbled upon a blog post about organizing and paying your bills using the method I'm going to tell you about - unfortunately I do not remember the blog it came from. It has seriously changed my life. It's changed OUR lives. Now, don't get me wrong, we still have debt, we still aren't perfect, but we have not missed any payments after starting this easy organizational tip.

So to start, I am an avid reader/follower/admirer of Jen from iHeart Organizing. And after reading about her bills binder, I made the choice to start my own. Hers is a little different from mine, but very similar too. I purchased her "Personalized Household Binder, Printable Kit" and started gathering all of my tools for bill paying. ((That kit seriously has every single checklist you could think of, more about that later.)) 


In my binder:

1. 3-hole pencil/pen pouch
2. Pens
3. Pencils
4. Letter opener
5. White-out
6. Loan coupon books
7. 3-hole tabbed dividers
8. A binder clip

Optional items:

9. Calculator (I just use my iPhone)
10. Blank envelopes
11. Stamps
12. Return address labels/stamp
(These things are all in a desk organizer on my file cabinet so I don't keep them in the pencil pouch)

Here is my routine:

First, it's best to setup the finance checklist that comes in the bundle from iHeart Organizing, or you can download free templates with a simple Google search (that's what I did before I found the one I use now). All you have to do is write each bill down and the due date. I put all of mine in order by date. For the miscellaneous bills, like medical bills, I just write it in, if/when we receive it, at the bottom of the checklist. This is one of the best things that has kept me organized. 


I also write my bills on my calendar that I hang up so that I can check them off when they have cleared our account.


Around (but I try to do it on) the 1st of every month, I sit down with all of my bills for the month and put them in order of when they are due. I write checks for the ones that have to be paid by check, or I set up auto-withdrawals for the ones that qualify. I also have a few that are recurring auto-withdrawals, which helps out a lot. I will write down the check number on the line for that bill, under the correct month, and check mark the box. If it is paid online, I write 'online'. If it's an auto-withdrawal, I write 'auto'. If, for some reason I haven't received the bill for the next month by the time I sit down to do this, I leave it blank and write a note on my calendar to check my Bills Binder. But I usually do not have to worry about that. *Just wanted to state that I write all of my checks for the date I am sitting down to do my bills, as well* I made a mistake once, trying to write a check for the date it is supposed to be sent out, and it was post-dated when it arrived to the bill collector. Oops! So I avoid that altogether now, and just write the date it is, on the check. Once I have the check written out, I will put it in the envelope and at the bottom-right corner of the envelope I write, very small, the date it is suppose to go in the mail. (I usually give the bill 2-3 days to travel through mail). I do this for all of my bills that have checks/money/certified checks in them. The bills paid online, I set it up to pay on a certain date. You can do that. Believe me. Same with auto-withdrawal from my bank. After everything is complete, I set my bills, IN ORDER BY DATE, in the "To Send" slot of our mail organizer. (I have yet to find something I like to attach to the mesh bin as labels, but this will do for now).


After all of this is finished, I hole punch each bill statement, and file it in the binder under the corresponding section. I keep bill statements for a full year.

Another quick tip on keeping finances organized, is to use a checkbook registry! I thought for years I didn't need one - and I went years without one. But with a lot more bills in our household nowadays, it is a must. Especially since we have 2 checking accounts. We separate our checking accounts, one for "spending," one for "bills." It is so much easier to keep money on track when this is separated.


We usually put our receipts in these simple folders I made with some scrapbook paper, tape, and labels. Sooo easy. About once or twice a week, I'll take 10 minutes to balance our checkbooks. Seriously, that's all the time it takes.


Another binder I have, is my actual Household Binder. (My other one says "Household Binder" on it, but it's actually my 'Bills Binder'.) There are so many checklists in there to keep things on track, I feel like everything is covered in my home now. Included in the bundle from iHeart Organizing is,

1. A 12-month calendar (that you fill in)
2. Daily Goals
3. Family Outing Ideas
4. Monthly Finance Checklist 
5. Monthly Budget Worksheets
6. Home Maintenance Checklist
7. Automotive Maintenance Checklist
8. Cleaning Checklist
9. Babysitter Notes
10. Pet sitter Notes
11. Meal Planning Calendar
**AND MANY MORE!


I really hope this has helped some of you figure out, how to get and keep, your bills paid on time and organized. It has helped me in more ways than one. Let me know if you use a similar binder method, or heck, let me know how you organize your bill paying by leaving a comment below. I love to read comments. Until next time.

Friday, January 23, 2015

The Many Uses of Mason Jars

Mason Jars... where do I begin? 


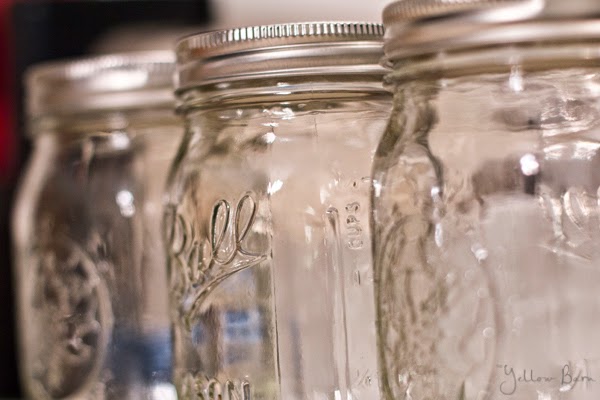
There are so many things to do, to use, to create with mason jars, besides using them for only your typical canning. First of all, let's talk a little about the history. They were first introduced by a guy named, John L. Mason, who was a tinsmith from Philadelphia. He later moved to New York to obtain his first patent. Ball mason jars are actually produced in Muncie, Indiana by the Frank C. Ball mason fruit jar manufacturer. (Yep, here in Indiana!) The Ball mason jar logo has changed 7 times over the course of 130 years, with the first logo dating all the way back to 1885. (Wowzers!) The jars were first introduced for fruit preserving or canning jellies and jams, but are used for far more interesting things now. The best thing about them nowadays are how inexpensive they are. I bought a 12-pack for around $8. The ones I picked up were the 12 oz, clear jars, with the typical 2-piece lids. There are many different options as well. Different colors, different sizes, different lid options. The ideas are endless.


So for the first thing I use mason jars for is food storage. Glass is 100% healthier than storing your foods in a plastic container. There have been articles stating that food that is stored in plastic tupperware, then heated in a microwave, leads to leaching gases and chemicals into your food. Not healthy at all. So I've decided that I want to switch out my Tupperware for glass - over time. It might take a year to do so, but that's one of my goals. Mason jars do not have BPA in them, and you don't have to worry about any other chemicals leaching into your food and drinks. It's simply glass and a metal lid. I store my washed berries in them. It's convenient because I can see what's in the jar and how much is left. Plus it stacks nicely in a fridge - if you're anything like me, then you have a panic attack if things aren't orderly in that thing, am I right?


I also store candy in mason jars as well. It keeps the candy fresher since they seal air out completely.


Another great use of mason jars is using them as drinking glasses. Again, glass is better for you because of the reasons I mentioned above. So I just pop the middle part of the lid out and insert a straw (a paper straw, not plastic) and voila!


Seriously, how cute is this straw?

To transform mason jars into decor, all you need is some acrylic paint. Seriously, how easy? I opted to paint the inside of the jars for this project. Make sure you let the paint dry AND cure for the recommended time on the bottle - learn from my mistakes! Haha.


But, you can also apply the paint to the outside and take sandpaper and rough up the edges for a more rustic look. (I might do this also). I just put some [fake] hydrangeas in them. Put whatever you want in them though... pencils, makeup brushes, straws, q-tips, cotton balls, etc.


Another awesome idea for mason jars, is to use them for bathroom storage - a hand soap dispenser and a toothbrush holder. The easiest way to do this is to purchase the Loew Cornell TransformMason jar kits. I bought all of mine at Hobby Lobby, but I've seen them at Wal-mart, and you can always order them online. All you need to do is follow the instructions that come with the kits. That easy... AND you can paint it to match your bathroom decor.


{via}                                                                 {via}


One of my favorite ways to use mason jars is to insert a tea light candle in the jar and you have some rustic-style romantic lighting for anywhere in your home. I added some Epsom salt to hold the light in place (and these are flame-less candles). 


You can also add a wire handle/hanger to hang on the front porch or in backyard trees as lanterns. Or do what I did, and grab one of the wire handle Loew Cornell TransformMason jar kits. They make beautiful and inexpensive lanterns.


{via}


Here is a lantern hanging up outside (we don't have trees at our house right now, since we just built our house in 2013, but landscaping is one of our plans for this year, yay!)


So, my love for mason jars has grown even more since beginning this post. I love the simplicity of them, the design, the rustic feel, and the history - that's my favorite part. It reminds me of my Grandparents. Here are a few mason jars I grabbed out of my Grandma's basement after she passed away last year. I HAD to have a few. They mean so much to me, and that blue tint - to. die. for. 


I really hope you enjoyed this as much as I did. If you liked it, please don't forget to subscribe with your email address so that you can keep updated. (The "Subscribe" button over there on the right). Until next time...