Showing posts with label home decor. Show all posts

Sunday, January 24, 2016

All About Cosmetics // Mini-Series 1 of 3 "Nail Polish"

Today marks the day I begin my mini series dedicated to cosmetics. I will be sharing 3 mini posts about cosmetics: nail polish, makeup, and hair products. I will be explaining how to store your cosmetics, where to look for expiration dates (and when to throw things away if it doesn't have an expiration date), and the importance of keeping up with organizing, repurchasing, and purging your cosmetics. Today, will be all about NAIL POLISH! 

Below is a photo of how I store my nail polish. I used a similar tutorial like this to create my nail polish rack (it was super easy!). You can also purchase acrylic nail polish racks here - I just opted for the cheaper route since it was going to be hidden in our closet. Before I took this photo, every single shelf was FULL of nail polish, and I even had a few that were just balancing on the edge since there was no room for more. But then I sorted through all the polishes, got rid of more than half, and only chose the ones I would really, actually wear. I also got rid of ones that were expired, dried up, or almost gone. 

I always keep my polishes in rainbow order so I can see what colors I have (or don't have), starting with reds and going all the way to purples. I separate out the glitter polishes and the nudes, pinks, creams, and neutrals. All of the base coats, top coats, and cuticle oils are at the bottom. This is just what works for me, but I highly recommend this system. I also leave spaces for new polishes. I will only purchase a new polish if I know one will be running out in the near future, or if there is killer sale on my favorites. 


As for expiration dates, MOST cosmetics have an expiration date. In the photo below, you will see a little symbol in the bottom-right of the bottle of nail polish that looks like a jar with the lid off and a number inside. That is the expiration date. This one says "24M," so this nail polish is good for 24 months. I've only had this polish for about a year and half, so I'm going to hang on to it. I would recommend writing the date of purchase with a Sharpie on all your nail polishes so you know when to throw them away. Or keep a spreadsheet nearby with the dates of when you purchased each polish. Here is a good option.


Storing nail polishes this way is super easy, convenient, and good for the actual polish. They should be stored upright, and not laid down on their side. (And having them visible always motivates me to use them.)


Let me know how you store your nail polishes, or better yet, take a photo and post it in the comments below! Happy painting!!

 I will be explaining MAKEUP in the next mini post... so be sure to subscribe so you don't miss it!

Sunday, January 10, 2016

Plumbing Pipe Shelves


Happy New Year to all of you... I hope this year brings you many blessings, love, and most importantly, DIY projects to complete. Our holiday season this year was one for the books. We actually made it through without any snow, which is unusual for Indiana at this time of year. It was about 50 degrees on Christmas Day {what?!}. We had a great time with family, despite the fact that my husband had to leave at 9:00am Christmas Day to help restore power in Michigan. It comes with the job. New Years Eve was spent in Cincinnati, OH with great friends. It was fun and something we have never done before. My favorite part was the firework display at New Years. So, now starts a new goal for 2016 for this blog... to complete a post every month (but, I'm shooting for more). I want to do more than just DIY projects though. Maybe some recipes, maybe some other things too, and that's where you come in. I need some suggestions on what you would like to see more of on here. Leave me a comment below this post of things you might like to see. But, nonetheless, I'm excited to start 2016 with a bang. So here we go...


To begin, we (because, yes, this was a project I needed help from the hubby) used stud wood from another project. It was just white stud wood. I had him cut me 2 shelves, one at 24" and one at 18". The other dimensions of the boards are 2" x 6". But you can make your shelves as long/short, thick/thin as you want.

Next, I used this stain to make them look weathered. I also applied a light coat of gray wood stain over the weathered stain, and then once it was completely dry, I added Minwax finishing wax to the shelves to ensure they were sealed for the bathroom.


Now comes the part where the hubs helped out. We bought the plumbing pipe at Menards. We picked up 4 - 1/2"x 6" black pipes that had threading on both ends, the caps to match, and the floor flanges to match. It's pretty simple, but if you need help at your hardware store, don't hesitate to ask. :) We figured out where we wanted the pipes to be attached to the shelves, then attached them with pipe straps.


Next, we held the shelves up to the wall and made marks of where the holes were to be drilled for the flanges. Then, hubs just attached everything together and to the wall.


This was one of the more simple projects we completed, but it makes a huge impact. It also showcases our style more. I love them, don't you?

Sunday, June 21, 2015

3-Foot Distressed Clock


Have you seen those huge, 3-foot clocks around town? You know, the distressed, rustic-style, vintage-looking clocks. Well, we (my husband and I) decided instead of spending upwards of $150 on one of those, we would build our own... for $50 tops! This was the first time I ever distressed brand new wood to make it look worn and old. This was the first time my husband ever made something out of wood, this big. And this was the first time a project worked out in general. I am so pleased with it, even if it isn't "perfect". We didn't follow any plans - since it's pretty much a simple circle - we just went for it. Here is the complete list of tools, items, and wood you will need for this project as you see it.

The main tools you will need:


Other tools you will need:


- Mider saw or circular saw (either would work)
- Hole bit
- Tape measure
- Pencil
- A spare nail (long enough to go through a 2x4" and into another board slightly)
- Sander
- Sand paper

The wood you will need:
- 2 2x4" stud length boards
- 2 2x6" stud length boards
- spare piece of 2x4" at least 18" in length

To finish the clock:
- Clock mechanism (from Hobby Lobby)
- Clock hands (from Hobby Lobby)
- Strongly brewed tea (8 tea bags per 2 cups of water)
- Homemade stain (click here for recipe)
- White primer or paint
- Roman numeral stencil (I made my own out of cardboard)
- Black chalkboard paint
- Paint brush or foam brush
- Stiple brush
- Sand paper
- Steel wool (optional)
- Wire brush (optional)
- Wax (optional)

Yes, there are a bunch of tools you will need to finish this project, but don't worry if you don't have every single piece of equipment - ask a friend, relative, or even at your local lumber & hardware store to see if they can make the cuts for you.

Ok, so for step 1, we cut the boards in half and laid them out in the order we wanted for the clock.


After that, we flipped all the boards over to trace a circle on the backs for a guideline to cut the clock out with. To create the "compass" for the circle, we used a nail, a piece of scrap 2"x 4", and a pencil. In the scrap piece of board [guide board], we drilled a hole at one end big enough for a pencil to fit through, and at the other end, a smaller hole for a nail to fit in. We made sure to find the dead center of the boards, and hammered a nail in that spot. We slid the guide board over the nail and slid the pencil in the hole at the other end. Finally we traced the circle onto the all of the boards, being careful not to shift any of them since they weren't secured together. 


Once the circle was traced on the boards, we attached the boards together using the pocket jig. This allows boards to fit together without the sight of nails (except for on the back side). It's an ingenious invention if you haven't seen it yet!


After the holes were drilled and the boards were attached together, we cut the clock out using the jigsaw. (And by we, I mean my husband! :))


Once the clock was actually cut out, the "pocket", for lack of better terms, was chiseled out of the back for the clock mechanism compartment. This is a must, so the clock sits flush on the wall.


Using a "hole bit" to cut out the hole and chiseling out the remainder to make it smooth.

Now it was time for the finishing process. And of course, I had a wedding to go to, so my amazingly-awesome hubby, applied the tea and vinegar-steel wool stain for me. (Just make sure to let each coat dry before applying the next one. He just applied 1 coat of each). 


After everything was completely dry... and a few weeks later, since we are really busy right now... I got to finish this piece up. I first applied a white primer that we had leftover in our basement - any white primer or paint will work. I let it dry completely and then distressed it with steel wool, sand paper, and a steel brush. 


Finally, I created roman numerals out of cardboard and painted them on the clock. I used black chalkboard paint to insure it was a matte finish. After that dried over night, I, then distressed everything again, and added some matte polyurethane for protection. 

Final step: adding the hands!


And here it is, finished and hung on the wall...

{P.S. Don't mind my OITNB on TV. Bonus points if you can tell me what season and episode this scene is from.}

Sunday, June 14, 2015

The Planter Ladder

In the beginning of spring this year, we decided it was time to venture into the art of wood-making. We - my husband, Tyler, and I - planned out a few projects we wanted to complete. A coffee table, two side tables for our living room, a sofa table-turned buffet table for our dining room, a three foot clock, four shutters, a blanket ladder, and a planter ladder. We also have come up with a few other project ideas, but we are starting with this list right now. We finished one of the projects - the planter ladder!


It isn't exactly what the plans called for, but we realized that the plans we have been going off of, are - I hate to say this - always wrong, and honestly, this error turned out for the better. The plans we used were from ana-white.com and we used the plans from the Cedar Vertical Tiered Ladder Garden Planter --- sort of. The plans are not well written, so when the hubs started cutting the boards, which is what the plans say to do, it ended up being the incorrect measurement, so the ladder is shorter than it should be. It should have five planter boxes on it, but they wouldn't all fit. Three boxes were fine with me. We are going to use the materials leftover to make planter boxes for a deck that we are probably going to build next year. It all worked out in the end however.

We bought everything the site lists, but instead of cedar boards, we just bought stud wood and stained it.

You'll need:

3 - 2"x6"x8'
5 - 5.5"x6' dog-ear fence boards
Nails
Screws
(estimated cost of project $20.00)

For the boxes:
Cut one of the 2"x6"x8' boards into ten (10) - 8 ⅛" pieces (cutting a 15 degree angle at the corners, making a trapezoid)
Cut the dog-ear boards into ten (10) - 23 ½" pieces and five (5) - 20 ½" pieces
Nail together the trapezoid pieces and the 23 ½" pieces to create the sides and front and back of the planter boxes. Next, nail the 20 ½" pieces on, creating the bottom. Make sure to drill drain holes in the bottom of the planted boxes so the water will drip out.

For the ladder:
Take the two remaining 2"x6"x8' and cut a 15 degree angle at the top, and at the bottom in the opposite direction so it leans on whatever you decide. Choose the distance you want between the boxes - usually anything more than 8" will work - and screw the boxes to the sides.

To finish, I used a dark brown stain and matte polyurethane finish, one coat of each.


I waited for everything to dry overnight, and planted flowers the next morning. Where the planter ladder sits, there isn't much sunlight that hits the area, except for a few minutes during the day. So I decided to get shade-only/morning-sun-only flowers. I love how it turned out, and it was pretty simple.


Let me know if you have a creative way to plant flowers besides in the typical flower pots - but there's nothing wrong with that either.

Until next time,

Monday, June 1, 2015

DIY Weathered Wood Stain

Here is a quick and easy stain recipe for that weathered, rustic look that is trending the world right now. It's super easy, super cheap, and looks great and takes little effort.


What you will need:

- Extra fine steel wool
- Vinegar (each type will produce a different color - I used distilled white vinegar)
- Glass jar with a metal lid (mason jars work best)

Break up pieces of the steel wool and place them in the glass jar, or put the entire spool in (like I did here). I can't give specific amounts because my steel wool came in a pack with a bunch of separate spools. I used one spool per jar. I poured the vinegar in the jar making sure to cover the steel wool and adding just a little bit more. Again, no specific measurements. Put the lid on LOOSELY. (I learned this the hard way... just recently actually. My steel wool wasn't dissolving, and I just stared at it like, "What the heck? Why is this crap not dissolving?" Well, I loosened the lid just thinking maybe it would help, and let it sit like that all day and BAM, it was dissolved and a dark grey/black color.) Shake it every so often, but make sure to tighten the lid first! After about 24 hours, you should be able to use it, but if you let it go longer, it wouldn't hurt it. Mine has been sitting in my garage for about 2 months and it's still perfectly fine.

The first time I did this, my steel wool did not dissolve completely in 24 hours, but it was able to still be used. I tested it on a scrap piece of board before using it on other projects... I definitely recommend this since it produces different colors depending on the vinegar type. Make sure to stain the wood before using this vinegar stain with dark, DARK tea or coffee. This gives the wood more tannin to react with. After all the stain has dried, lightly sand it to even out the stain color, and apply any type of sealant.

Until next time.

Sunday, April 26, 2015

DIY Simple Fire Pit


***WARNING***
The photos that are displayed in this post were not taken by myself. Unfortunately, I had to work the day my husband decided to complete our new fire pit, but he was sweet enough to attempt to take photos for me for each step (sweet, right?), and he did a pretty damn good job, considering the weather was rainy. Please forgive me on this post for not having "high-quality-blog-worthy-photos," this is REAL life, and it happens. At least you'll still get the "picture" --- haha! Get it?

Ok, so here it is. Finally. The DIY fire pit that everyone posts about. I've seen it on everyone's Outdoor board or Landscaping board or DIY board on Pinterest. I mean, honestly, I pinned probably 7 different ones before we did our own. The difference in ours is, we took a little bit from every post we read and made it our own. IT. WAS. SIMPLE. Like, a monkey could do it - simple. The things you will need for this project are:

1. Landscaping pavers
2. River rock or pebbles
3. Sand (optional - we did not use this)
4. A wheelbarrow
5. Hand tamper
6. Orange spray paint
7. Rope
8. Screw driver
9. Shovel
10. Scrap 2x4" (to place level on)
11. Level
12. PL Premium landscaping/concrete adhesive

*We opted for a bigger fire pit, because my husband wanted to make sure bigger pieces of wood could fit easily in the pit to be burned. So we went for a 3-foot inner diameter. Check your local landscaping/home improvement store for different options. We went to Lowe's and purchased the largest pavers we could. I think we ended up buying 45 pavers and used 42.

So, the first step is to obviously figure out where you want your pit to be in your yard. Then you'll want to spray paint the circle on the ground where the stone will be laid. To come up with the radius, you take the inner circle diameter measurement, divide by 2 + the depth of the paver + another foot for the outside = the radius --- make sure all measurements end up in inches - it just makes it easier.

Our math problem looked like this (feet converted to inches): 36"/2+7.5"+12"=37.5"
For a 4 foot inner circle: 48"/2+7.5"+12"=43.5"
For a 3 foot inner circle but smaller pavers: 36"/2+4"+12"=34
*It just all depends on the inner circle diameter, the depth of the pavers, and the amount of stone you want around the outside of your fire pit.

After you have your radius figured out, you are going to measure your rope to this. One end will be staked in the middle of where the pit will be (we used a screw driver in the ground to hold the rope in the center), the other end we taped at 37.5" and kept the spray can at that point while spraying the circle on the ground by swinging the rope 360 degrees. It sounds more complicated typing this out, but it was really easy. Here is, as good of a photo as I could get... (It was taken a few days after spraying it, and it had rained in between those days also - GOOD OLE INDIANA SPRING WEATHER, blah).


We messed up our measurements the first time, so there are 2 orange circles. The outer circle, is the correct measurement. 

Once the circle is painted on the ground, it's time to cut the grass and pull the sod up. Keep the sod for any bare spots in your yard. As you can tell by the photos, we had A. Lot. of bare spots... new-yard-struggles ya'll.

Next, the ground will need to be tamped so it's packed and helps with the stone from settling. Try to get this as level as you can, keeping in my mind the slope of your yard. This is also the step where you can add sand on top of the tamped dirt to help even more with settling.


After the dirt is tamped, fill in the circle with the type of stone you desire. It honestly doesn't matter, I just wouldn't get anything too crumbly, since it will be getting pretty hot with the fire. We opted for simple "river pebbles" from Lowe's. Make sure to get the stone as level as possible. Using a scrap board and setting a level on top of that will help.


Next, set the first layer of pavers in the rocks, making sure it creates a circle in the center, and that it is as level as possible. My husband spaced out the pavers just a little, for 1) allowing air into the bottom of the pit to keep the fire "alive" and 2) if they were all touching, it wouldn't make a perfect 3' inner circle diameter.


Before placing the 2nd and 3rd layers of pavers on, make sure to apply the landscaping adhesive to both sides of the pavers - it adhered better that way. After you get the last layer on, you're done! That's it. So simple, see?


(How about those cute Hubby work boots making an appearance in the photo? He did such as good job on this!)

Another step you can do, but we didn't, is to spray the pavers on the inside of the pit with high heat spray paint to help them from becoming weak and crumbling. I didn't think it was that big of a deal, so we opted not to. Plus I didn't want the inside of the fire pit black. You could, though, put a metal ring on the inside. Again, we opted not to, but would, if needed, down the road.

So, there you have it. The easiest, outdoor, DIY project you can do for a pretty tight budget. I think we spent a total of $125.00 on everything. Obviously we already had the screw driver, rope, spray paint, and shovel, and we borrowed the wheelbarrow and hand tamp, but everything else we bought.


Let me know if you decide to complete a fire pit this summer. Attach your photos of it below.

In other news... we are currently completing a new coffee table using Ana White's plans for the Rustic X Coffee Table. I'm using a special DIY stain to make it look weathered - I'm pretty excited! I will let you all know how that turns out, so make sure you are following on Facebook at www.facebook.com/theyellowbarn1

Until next time,

Friday, January 23, 2015

The Many Uses of Mason Jars

Mason Jars... where do I begin? 


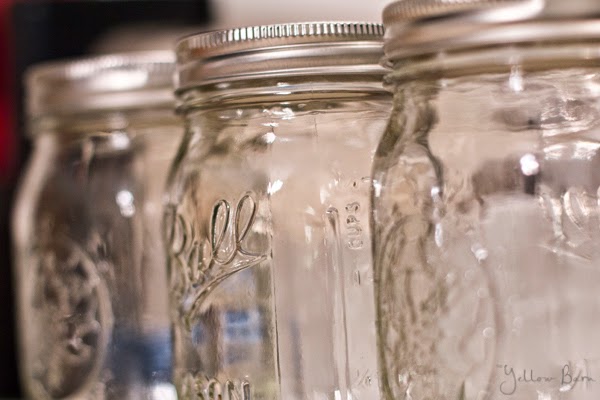
There are so many things to do, to use, to create with mason jars, besides using them for only your typical canning. First of all, let's talk a little about the history. They were first introduced by a guy named, John L. Mason, who was a tinsmith from Philadelphia. He later moved to New York to obtain his first patent. Ball mason jars are actually produced in Muncie, Indiana by the Frank C. Ball mason fruit jar manufacturer. (Yep, here in Indiana!) The Ball mason jar logo has changed 7 times over the course of 130 years, with the first logo dating all the way back to 1885. (Wowzers!) The jars were first introduced for fruit preserving or canning jellies and jams, but are used for far more interesting things now. The best thing about them nowadays are how inexpensive they are. I bought a 12-pack for around $8. The ones I picked up were the 12 oz, clear jars, with the typical 2-piece lids. There are many different options as well. Different colors, different sizes, different lid options. The ideas are endless.


So for the first thing I use mason jars for is food storage. Glass is 100% healthier than storing your foods in a plastic container. There have been articles stating that food that is stored in plastic tupperware, then heated in a microwave, leads to leaching gases and chemicals into your food. Not healthy at all. So I've decided that I want to switch out my Tupperware for glass - over time. It might take a year to do so, but that's one of my goals. Mason jars do not have BPA in them, and you don't have to worry about any other chemicals leaching into your food and drinks. It's simply glass and a metal lid. I store my washed berries in them. It's convenient because I can see what's in the jar and how much is left. Plus it stacks nicely in a fridge - if you're anything like me, then you have a panic attack if things aren't orderly in that thing, am I right?


I also store candy in mason jars as well. It keeps the candy fresher since they seal air out completely.


Another great use of mason jars is using them as drinking glasses. Again, glass is better for you because of the reasons I mentioned above. So I just pop the middle part of the lid out and insert a straw (a paper straw, not plastic) and voila!


Seriously, how cute is this straw?

To transform mason jars into decor, all you need is some acrylic paint. Seriously, how easy? I opted to paint the inside of the jars for this project. Make sure you let the paint dry AND cure for the recommended time on the bottle - learn from my mistakes! Haha.


But, you can also apply the paint to the outside and take sandpaper and rough up the edges for a more rustic look. (I might do this also). I just put some [fake] hydrangeas in them. Put whatever you want in them though... pencils, makeup brushes, straws, q-tips, cotton balls, etc.


Another awesome idea for mason jars, is to use them for bathroom storage - a hand soap dispenser and a toothbrush holder. The easiest way to do this is to purchase the Loew Cornell TransformMason jar kits. I bought all of mine at Hobby Lobby, but I've seen them at Wal-mart, and you can always order them online. All you need to do is follow the instructions that come with the kits. That easy... AND you can paint it to match your bathroom decor.


{via}                                                                 {via}


One of my favorite ways to use mason jars is to insert a tea light candle in the jar and you have some rustic-style romantic lighting for anywhere in your home. I added some Epsom salt to hold the light in place (and these are flame-less candles). 


You can also add a wire handle/hanger to hang on the front porch or in backyard trees as lanterns. Or do what I did, and grab one of the wire handle Loew Cornell TransformMason jar kits. They make beautiful and inexpensive lanterns.


{via}


Here is a lantern hanging up outside (we don't have trees at our house right now, since we just built our house in 2013, but landscaping is one of our plans for this year, yay!)


So, my love for mason jars has grown even more since beginning this post. I love the simplicity of them, the design, the rustic feel, and the history - that's my favorite part. It reminds me of my Grandparents. Here are a few mason jars I grabbed out of my Grandma's basement after she passed away last year. I HAD to have a few. They mean so much to me, and that blue tint - to. die. for. 


I really hope you enjoyed this as much as I did. If you liked it, please don't forget to subscribe with your email address so that you can keep updated. (The "Subscribe" button over there on the right). Until next time...