Friday, January 23, 2015

The Many Uses of Mason Jars

Mason Jars... where do I begin? 


There are so many things to do, to use, to create with mason jars, besides using them for only your typical canning. First of all, let's talk a little about the history. They were first introduced by a guy named, John L. Mason, who was a tinsmith from Philadelphia. He later moved to New York to obtain his first patent. Ball mason jars are actually produced in Muncie, Indiana by the Frank C. Ball mason fruit jar manufacturer. (Yep, here in Indiana!) The Ball mason jar logo has changed 7 times over the course of 130 years, with the first logo dating all the way back to 1885. (Wowzers!) The jars were first introduced for fruit preserving or canning jellies and jams, but are used for far more interesting things now. The best thing about them nowadays are how inexpensive they are. I bought a 12-pack for around $8. The ones I picked up were the 12 oz, clear jars, with the typical 2-piece lids. There are many different options as well. Different colors, different sizes, different lid options. The ideas are endless.
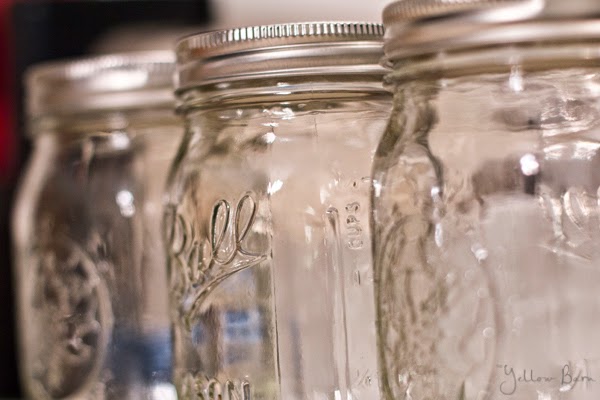

So for the first thing I use mason jars for is food storage. Glass is 100% healthier than storing your foods in a plastic container. There have been articles stating that food that is stored in plastic tupperware, then heated in a microwave, leads to leaching gases and chemicals into your food. Not healthy at all. So I've decided that I want to switch out my Tupperware for glass - over time. It might take a year to do so, but that's one of my goals. Mason jars do not have BPA in them, and you don't have to worry about any other chemicals leaching into your food and drinks. It's simply glass and a metal lid. I store my washed berries in them. It's convenient because I can see what's in the jar and how much is left. Plus it stacks nicely in a fridge - if you're anything like me, then you have a panic attack if things aren't orderly in that thing, am I right?


I also store candy in mason jars as well. It keeps the candy fresher since they seal air out completely.


Another great use of mason jars is using them as drinking glasses. Again, glass is better for you because of the reasons I mentioned above. So I just pop the middle part of the lid out and insert a straw (a paper straw, not plastic) and voila!


Seriously, how cute is this straw?

To transform mason jars into decor, all you need is some acrylic paint. Seriously, how easy? I opted to paint the inside of the jars for this project. Make sure you let the paint dry AND cure for the recommended time on the bottle - learn from my mistakes! Haha.


But, you can also apply the paint to the outside and take sandpaper and rough up the edges for a more rustic look. (I might do this also). I just put some [fake] hydrangeas in them. Put whatever you want in them though... pencils, makeup brushes, straws, q-tips, cotton balls, etc.


Another awesome idea for mason jars, is to use them for bathroom storage - a hand soap dispenser and a toothbrush holder. The easiest way to do this is to purchase the Loew Cornell TransformMason jar kits. I bought all of mine at Hobby Lobby, but I've seen them at Wal-mart, and you can always order them online. All you need to do is follow the instructions that come with the kits. That easy... AND you can paint it to match your bathroom decor.


{via}                                                                 {via}


One of my favorite ways to use mason jars is to insert a tea light candle in the jar and you have some rustic-style romantic lighting for anywhere in your home. I added some Epsom salt to hold the light in place (and these are flame-less candles). 


You can also add a wire handle/hanger to hang on the front porch or in backyard trees as lanterns. Or do what I did, and grab one of the wire handle Loew Cornell TransformMason jar kits. They make beautiful and inexpensive lanterns.


{via}


Here is a lantern hanging up outside (we don't have trees at our house right now, since we just built our house in 2013, but landscaping is one of our plans for this year, yay!)


So, my love for mason jars has grown even more since beginning this post. I love the simplicity of them, the design, the rustic feel, and the history - that's my favorite part. It reminds me of my Grandparents. Here are a few mason jars I grabbed out of my Grandma's basement after she passed away last year. I HAD to have a few. They mean so much to me, and that blue tint - to. die. for. 


I really hope you enjoyed this as much as I did. If you liked it, please don't forget to subscribe with your email address so that you can keep updated. (The "Subscribe" button over there on the right). Until next time...

Thursday, January 1, 2015

Happy New Year!

I just wanted to wish everyone a very, Happy New Year! I was pretty quiet around here in December - we've been dealing with terrible respiratory infections for the past few weeks, yuck! - but, I plan on doing a post, minimum, once a month! I have a ton of ideas, it just takes a lot of planning, organizing, and execution. I think one post a month is a pretty, well-set goal, especially with working a full-time job as well. This is just something I am extremely passionate about, love to do, and get excited for. Decorating, organizing, DIY-ing, all of it. I love it. I will also be having a few give-a-ways coming up, so please keep an eye out for that! Now, I ask of you, what are some things you would like to see on here? Please post a comment below!! I love to hear input/ideas/suggestions.

I hope you all had an amazing end to your 2014, and here's to a great start to 2015. To health, wealth, happiness, and love. Until next time...

Sunday, November 30, 2014

Christmas 2014 - Pinterest Projects Galore

It's here. It's finally here. We got through Thanksgiving, survived Black Friday, gearing up for Cyber Monday, and decorating for Christmas Day. I can't believe where the time has gone. It seems like yesterday I was decorating for Christmas 2013. I just can't comprehend where the time goes. *Slow down, time, slow down* So in our household, we don't do anything Christmas-wise (except shopping) until after Thanksgiving. We don't believe in it. We never have. If that's what you and your family does, that's totally fine, just not what we do in our neck of the woods. We like to take the time during Thanksgiving and really be thankful for what we have, and focus on only that. Then, afterwards, we get started for Christmas. Our tradition - or my tradition, rather - is to set up the tree the day after Thanksgiving. I have for the last 5 or 6 years of being on my own, so it's just something I want to keep up with. Christmas is my absolute favorite holiday and time of the year. And YES, I do love winter and snow! (I know, I'm crazy. Maybe I should just move to Colorado or something. Yes. Colorado!) I think my love for Christmas came from my grandmother (my mom's mom). She loved Christmas too. She always had the best Christmas decorations... and gave the best presents - ahem! (But we all know that's not what Christmas is truly about.) I loved going over to her house and spending time with her. I really do miss her - it's been almost 10 years since she's passed, so I guess in my own little way, I feel like when I celebrate Christmas by decorating, cooking, baking, wrapping, writing, etc., I make her come alive again for a few short weeks. (Is that weird? Maybe it is, but that's how I feel.) Ok, on to our Christmas-decorated house. And like the title suggests, I completed a TON of Pinterest projects for this year's theme. I will give the links, I promise! Our theme this year, because I do have to have a theme every year - did I mention I have problems with control? - is rustic and simple. I tried to keep things very simple and traditional, but rustic and outdoorsy at the same time. (DISCLAIMER: My house is a work in progress, even though we did build it. I have a few things I would like to change, especially the furniture, so bare with me on that aspect) Here is an overview of our living room...


Here are a few of the detail shots of the tree, with the corresponding Pinterest links I have...


I used 2 types of burlap. I think the 2 types give it more texture and design (I personally love the snowflake burlap the best!) The snowflake burlap is from our local Meijer superstore, and the regular burlap I purchased from Hobby Lobby, as well as the berry filler stems. The red and green ornaments were purchased at Meijer, and the reindeer ornaments were purchased at Target.


The pinecone ornaments are my own take on these. I LOVE this idea, and it was super affordable.


This ornament was a project we did last year for presents for all the grandmas and grandpas, from Riley. Here is the post that inspired this treasurable gift. (This ornament was my grandmother's (my dad's mom), she passed away a few months ago, and I definitely didn't want this thrown away. Snatched it up right away!) My only advice for this project is to use plastic ornaments. The glass ornaments are colored differently than the plastic ones, so the color of the ornament bled through the white paint and turned it all pink by the time it dried. We had to do all them over again. UGH! But I like the way these turned out anyway.

And our star is what started the entire theme for this year. It's from Target...


Here's our TV cabinet and stockings (Nope, no fireplace in this house. Something we had to forgo to be able to include other things - you know, budget, budget, budget)...


Here are a few close-ups...


Not sure where these are from, I got them so long ago.


My dad got this nativity set for us a few Christmas's back, so I'm not sure where it's from. I also have a Lenox nativity set that was my grandmother's, the one I mentioned in the beginning of this post, and I treasure it so dearly. I will only put that one out in our basement, but since the basement isn't finished yet, it stays safe in its box for the meantime. It's absolutely beautiful though. Just take my word for it. :)

Here's a little purchase I made this year for our theme from Hobby Lobby. There's another one of these somewhere in this post...


Of course we have to set up and set out the milk-cup and cookies-plate for Santa! (This used to be mine and my sister's.)


And then I just added a few small touches around the rest of the house. So here is an overview of our kitchen at the moment...


Just a couple, cute, traditional candle holders...


The Charlie Brown tree is a MUST!


And here we have the other tree. The urn was purchased from Hobby Lobby as well...


I even decided to change up the design of our monogram on the chalkboard wall in the kitchen. This post on Pinterest is what I followed to create my own look... (yes, all freehand)


Here's what I added below the cork board...


And last, but certainly not least, the outside of our home...


I still need to change out the rug for Christmas, I just haven't found one I liked yet. The planters next to the door will have something in them soon... DIY-blog-post-worthy, so keep checking back!!

Here is the wreath. So simple, and so pretty. Burlap was purchased from Joann Fabrics. Wreath is from Hobby Lobby.


So as the holiday season approaches, I hope you and your family have a wonderful time decorating a tree, baking cookies, sipping hot chocolate, or just spending time together. Take the time to do something nice for someone else this year, it will really make a difference. Until next time... 

Sunday, November 16, 2014

Covered Pill Bottles

Seriously, let's just take a moment and appreciate the beautiful weather outside here in Indiana... just kidding! We are under a winter weather advisory right now, and of course it's snowing outside. (Don't get me wrong, I LOVE the snow, I just am not quite ready for it, yet. Especially since we had a horrible winter last year. Welcome to the Midwest, right?!)

Ok, so this DIY is EXTREMELY simple, easy, and cheap! There is a disclaimer that my husband said I should probably include (his inner wanna-be-cop came out, haha), so before we get started...

***DO NOT carry these covered pill bottles in your purse, car, or anywhere else where you may be stopped by law enforcement. They are mainly for home use.***

So, for the record, all of these pill bottles are the ones I have saved over the years - I do NOT take this much medicine in one day. Whew, thank the good Lord! I only HAVE to take 1 medicine a day - my Metformin for high blood sugar (no, I am not diabetic, I was diagnosed as pre-diabetic in my late teen years... long story that I will spare you). I had this pill bottle sitting on my bathroom sink since we moved in. I HATED looking at it every single day. I didn't like the color, it didn't match anything (I have issues, I know), and it just stuck out like a sore thumb. So I figured out a way to keep it on my sink, but make it into something a little more pleasing to the eye...


Much better than those BRIGHT orange bottles... or whatever color your medicine hides in.

So whether you keep your medicine in your bathroom like me, or in the kitchen, or anywhere, look how bad these bottles stick out...


But with a few simple tools, and a few minutes, you can make make-over your pill bottles.

Here are the tools I used:


1. A Paper Cutter (I got mine from Wal-mart)
2. Scrap-book Paper (Hobby Lobby)
3. 3D Letter Stickers (Hobby Lobby)
4. Circle Stickers (Hobby Lobby)
5. Permanent Markers (I use Sharpie's, and I usually get them from Office Depot)
6. Glitter Letter Stickers (here's something similar at Hobby Lobby)
7. Pill Bottles 
8. Scissors (Office Depot)
9. A Pen (Office Depot)
10. Tape (Office Depot)

The letter stickers and markers are for the pill bottle cap, to either write what medicine it is, how many times a day you have to take it, whom it's for, or in what order you take it. You can even paint the caps, glitter-ize them, or whatever your little DIY heart desires. I just wanted them all white.

So the first, and most important step is to take a photo of the label (or write down all the important details like the prescription number, the amount of refills, the date the refills run out, the pharmacy phone number, the doctor who prescribed the medicine, and any important notes about how to take the medicine. VERY IMPORTANT, because you will be covering the label completely!


Next you will want to find a scrap piece of paper (I used a scrap of the scrap-booking paper), so you can measure the height of the bottle. Now, it's very important that you measure from the bottom of the "lip/ridge/edge" of where the cap screws onto the bottle. So if you look at the photo below, I lined the paper up with the bottom of the lip, where the cap goes on.


After that, make a small mark on your scrap piece of paper, or your "guide". Then you take the scrapbook paper you want to cover your bottle with, turn it to the back side, and mark 3 spots on the length of the paper, using your guide.


Next, you'll want to make sure you have enough paper to make it all the way around the bottle. I just took the bottle and rolled the paper around it, and made a small mark close to where the end was - a little overlapping is GOOD!


Once you have all of your marks, just take your paper cutter and slice through.


Just make sure you line up your marks with the edge of the cutter. AND BE CAREFUL, that blade is SHARP!

Finally, all you have to do is take a piece of tape and adhere the paper to the bottle, roll it around the entire bottle and tape off the end.


I used matte tape here, but it looks better in person than on here because I wanted to make it noticeable of where the tape was placed. You can always use double-sided tape, or even glue. I just didn't have the time for that at the moment. And here is the final piece...


And here is the top...


Again, do whatever you can to make sure you take your medicine how it is prescribed, by writing it on the cap, or what I did was to write the medicine on the bottom with a permanent marker. I can't stress this point enough! I don't want anyone rushed to the hospital because they covered their label and forgot when to take their medicine.

So we went from...


To... drum roll please...


I hope this was helpful for some of you, especially those of you who have to take medicine regularly. Stay healthy, happy, and WARM!